
Licensing
Managing your RMF Device Licenses
Introduction
The License block is the control panel for your organisation’s pool of RMF licences. From here you can:
Assign licences – Allocate free licences to newly added cameras or other devices.
Release licences – Recover licences from devices that have been decommissioned or no longer need redundancy.
Re-balance licences – Shift licences between devices.
Note:
Device licenses are manually assignable only in the Back-Up mode.
Devices are auto-licensed in Restore mode if they are present on a secondary recorder and absent from the corresponding primary recorder, provided the mapping is one-to-one and licenses are available.
A camera must be part of a device group for an RMF license to be assignable to it.
Prerequisite
Complete Storage Linking.
Assign Licenses
Perform the following steps to assign licenses:
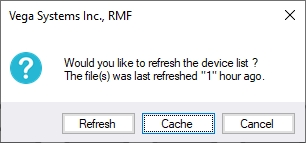
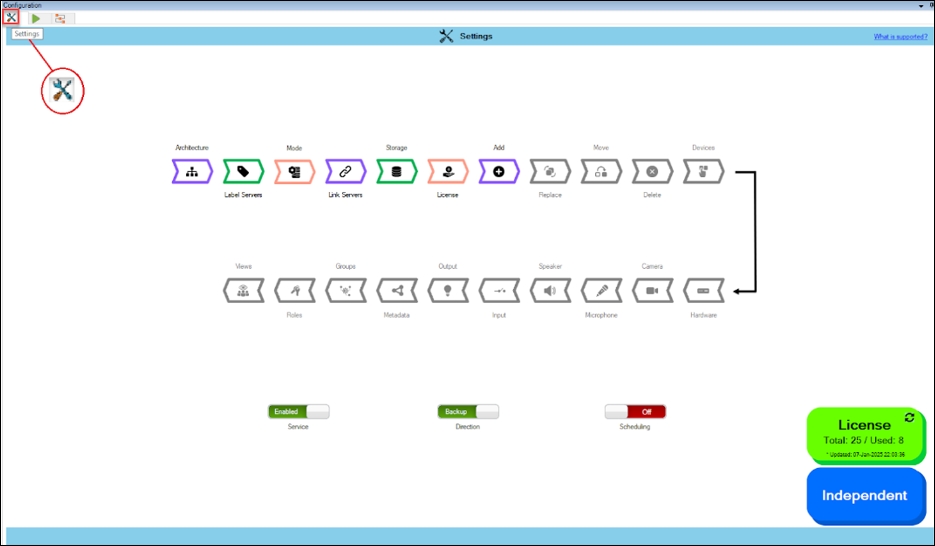
Click the License block.

Step Result: The confirmatory dialog box appears. Select Refresh to log in and retrieve the latest device list, or choose Cache to continue configuration with the previously fetched device list. The Cache option saves time at large installations.
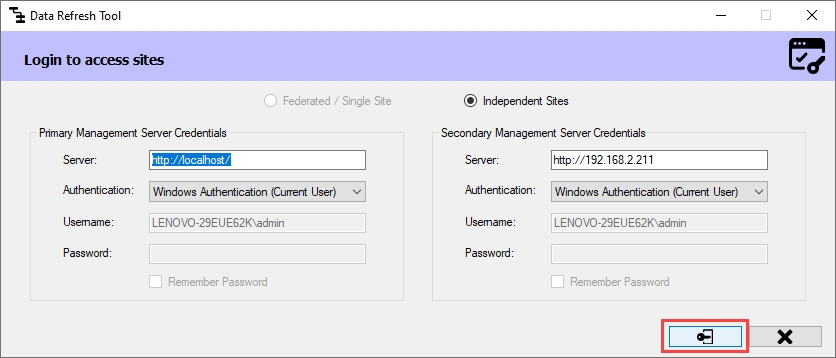
a. If Refresh is chosen for an Independent architecture, the following screen appears:
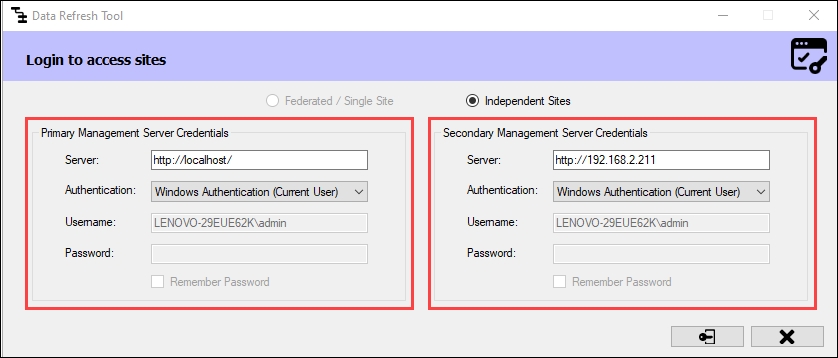
Simply click Connect at the bottom right corner of the screen to continue.
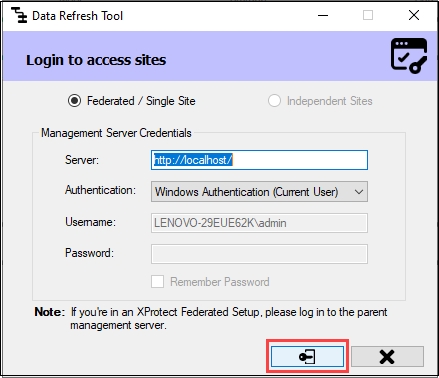
b. If Refresh is chosen in a Federated/Single Site, the following screen appears:
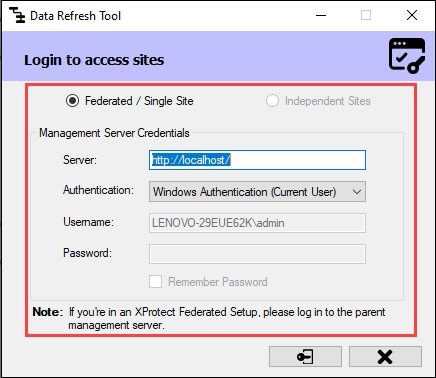
Click Connect at the bottom right corner of the screen to continue.
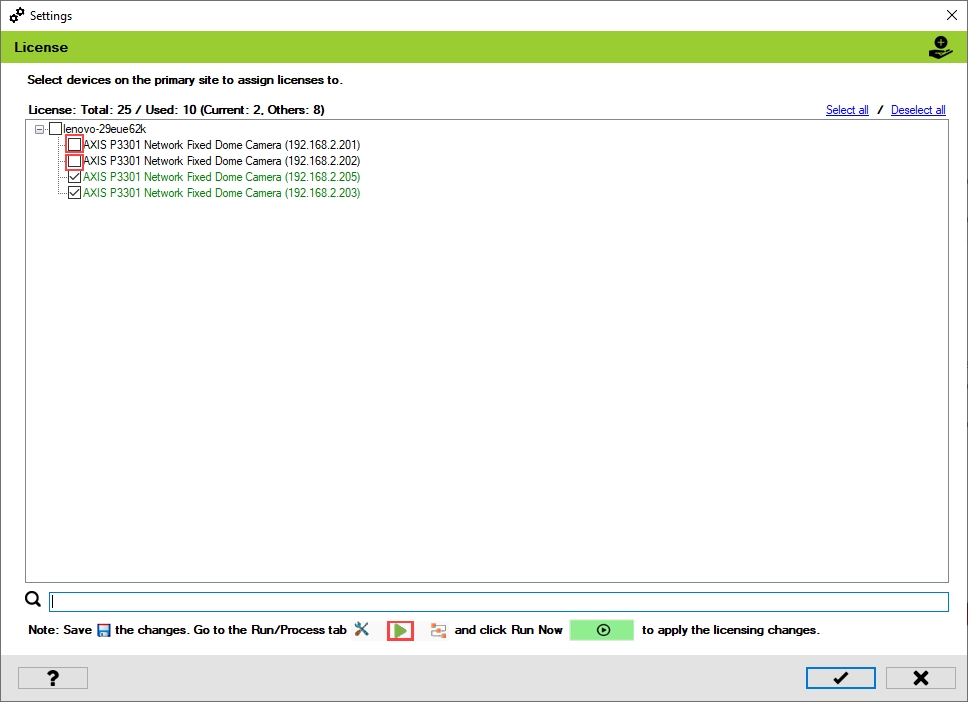
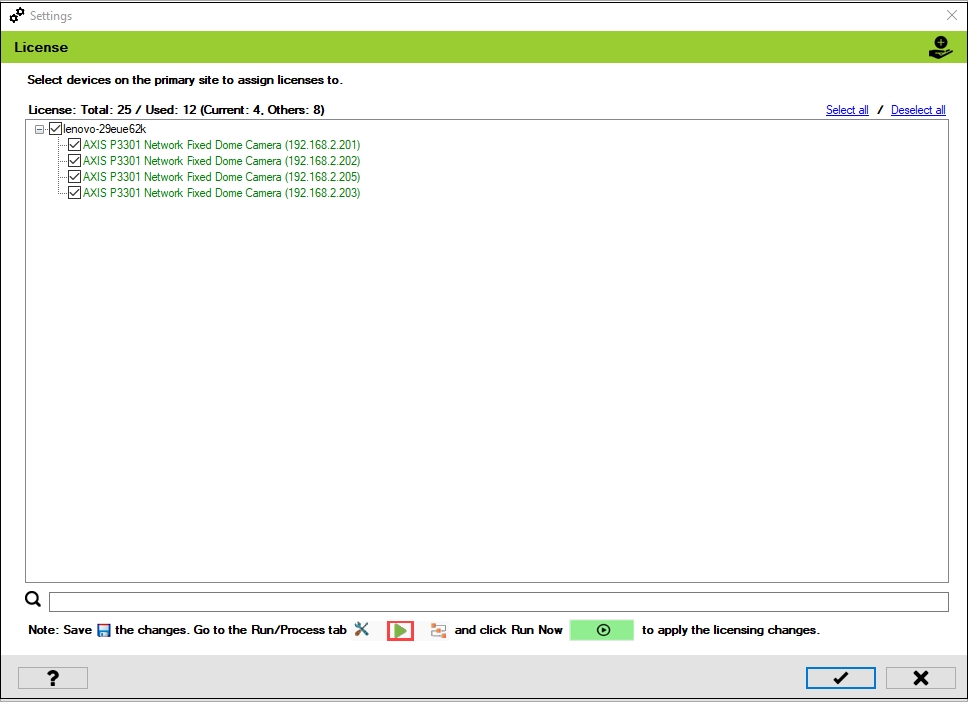
Step Result: The License screen appears. It lists all devices available on the Primary server. The total number of RMF licenses purchased for the current Milestone Software License Code is the total license count.
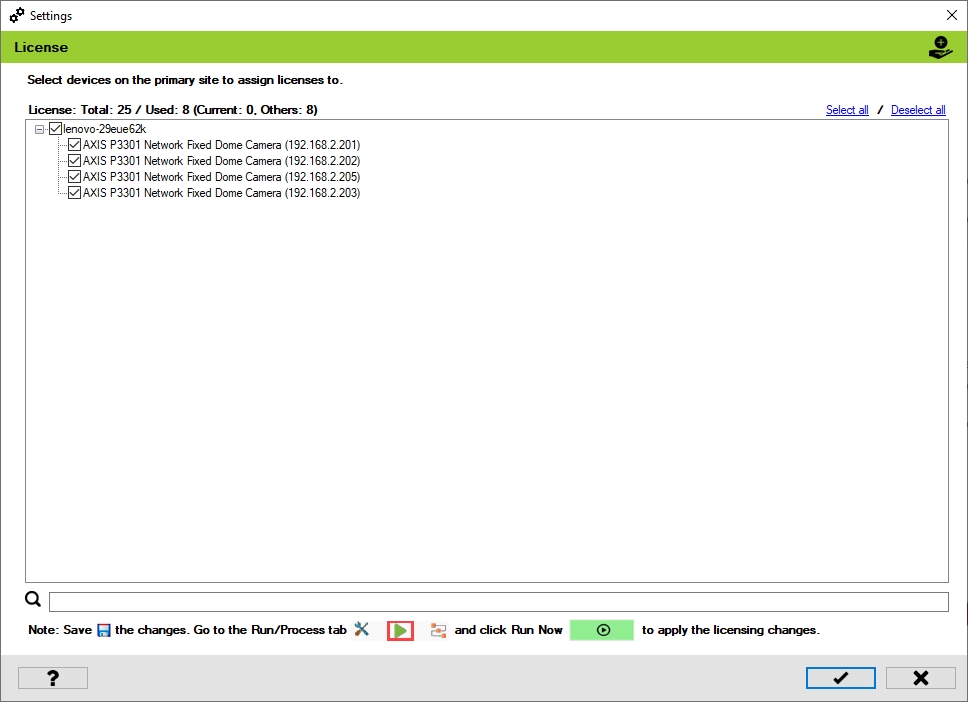
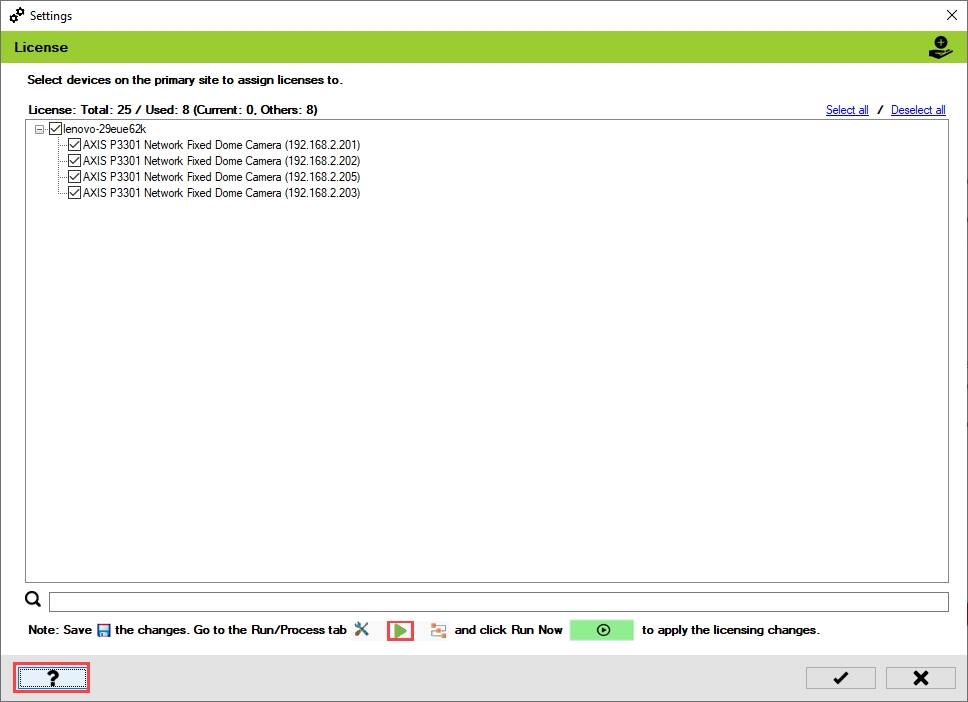
Select devices on the Primary site to assign licenses. Click the Help icon for additional information.

The following are some license tasks that can be performed.
Assign License if Available
Do not Assign a License
Retain license
Release license
Assign License if Available
The camera name in black font denotes that it is unlicensed. Select the device check box to assign licenses to it.
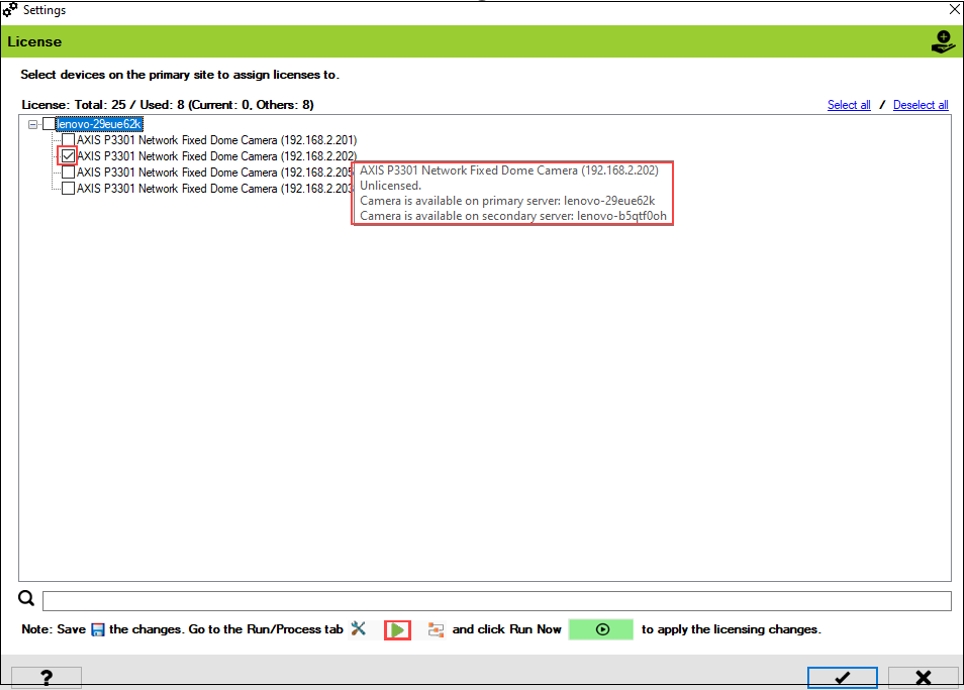
Do Not Assign a License Even if Available
Clearing the check box for a device shown in a black font will keep it unlicensed.
Retain License
Maintaining a checked box for a device whose name is displayed in green font will keep the device licensed.
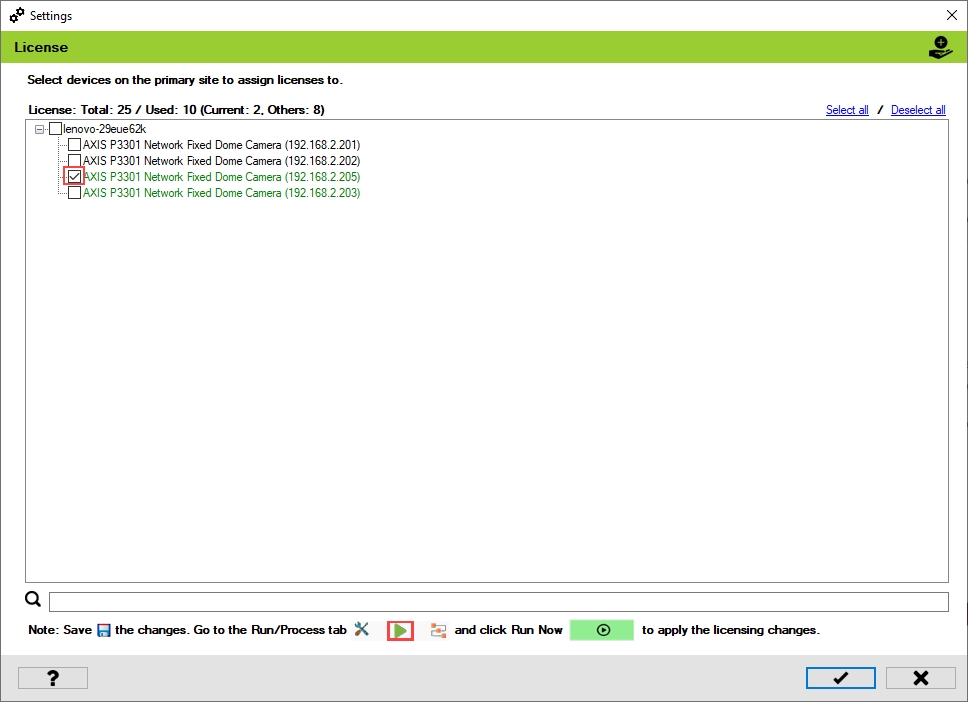
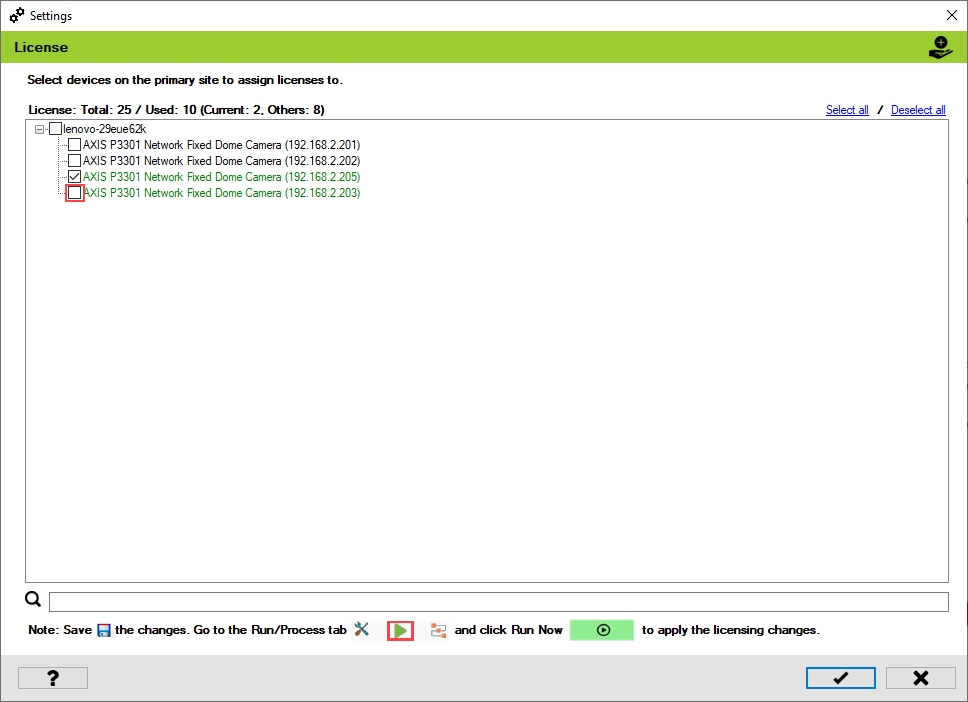
Release License
To release the license of an already licensed camera, clear its check box.
Click the Save icon to save the changes.

Click Save in the Milestone toolbar to save the changes.
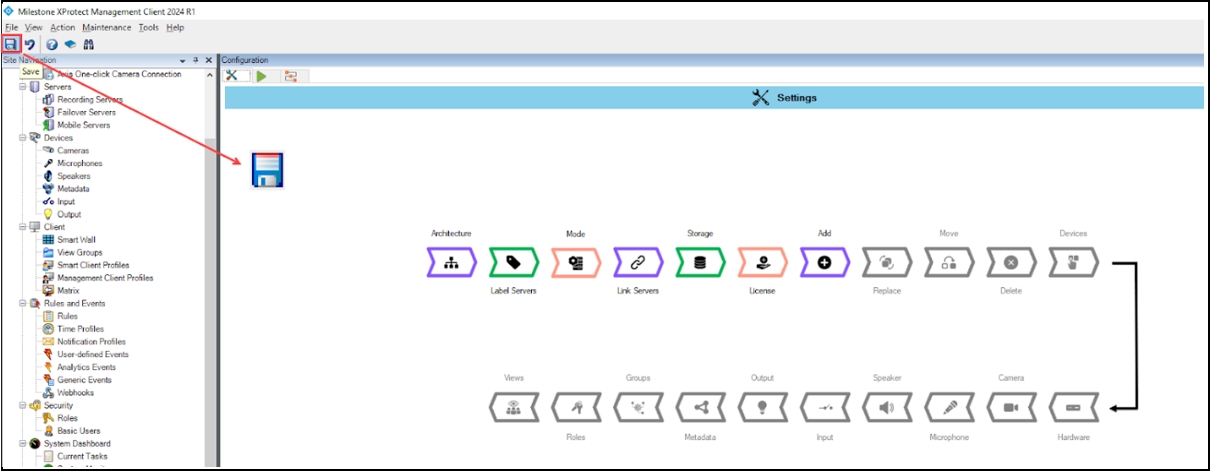
To apply licensing changes immediately, click the Run/Process tab at the top left corner.
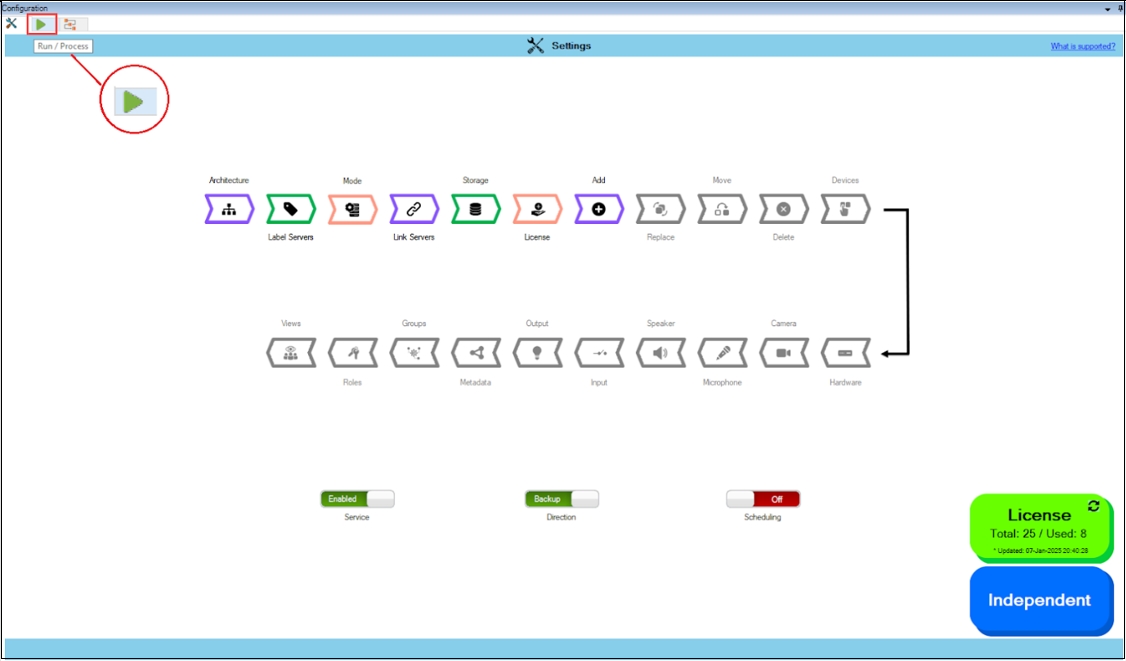
Click the Run Now icon to commit license changes immediately. Or, if the service is scheduled, the license changes are committed during its next run.

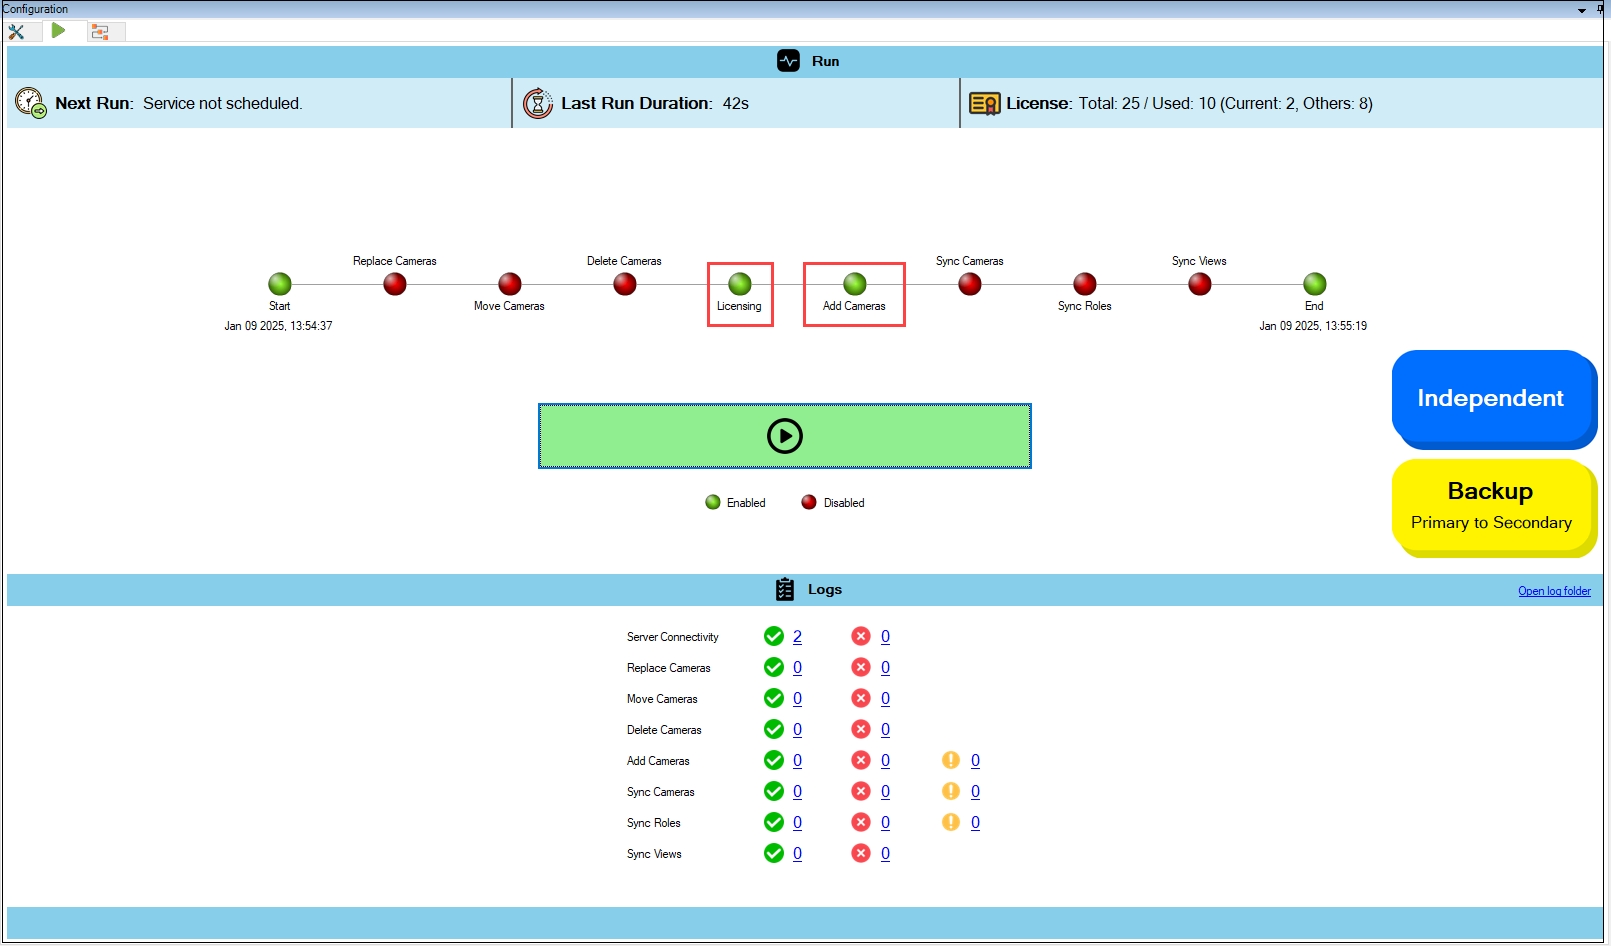
A process run begins with the following screen.

When the process is completed, all amber lights should be green, and one cannot see blinking LEDs.
The licenses for the selected cameras are allocated in the picture below. The green font denotes that the cameras are licensed.
Last updated