LogoLogo
Vega Systems IncRedundancyXPort
Redundancy Management Framework
  • 👋Introduction
  • 🗒️Release Notes
    • 7.4.0
    • 7.2.3
    • 7.2.2
    • 7.2.1
    • 7.2.0
    • 7.1.9
    • 7.1.8
    • 7.1.7
    • 7.1.6
    • 7.1.5
    • 7.1.4
    • 7.1.3
    • 7.1.2
    • 7.1.0
  • 🗝️Key Features
  • 💠Software Components
  • 🏗️Architecture Options
    • Federated
    • Independent
    • Single Site
  • 🗺️What to Install Where
    • Federated
      • Non-Clustered Mode
      • Clustered Mode
    • Independent
      • Non-Clustered Mode
      • Clustered Mode
    • Single Site
      • Non-Clustered Mode
      • Clustered Mode
  • 👨‍💻Installation
    • Pre-Installation
    • Manual Installation
      • RMF Services (Manual)
      • RMF Client (Manual)
    • Silent Installation
      • RMF Services (Silent)
      • RMF Client (Silent)
    • Post-Installation
      • Validate the Installation of RMF Services and UI
      • Validate the Installation of RMF Smart Client Components
    • Uninstallation
      • Manual Uninstallation
      • Silent Uninstallation
  • 🏷️License Activation
    • Online Activation
    • Offline Activation
      • Export License for Activation
      • Import Activated License
  • ⚙️Configuration Dashboard
    • Accessing the RMF Config Dashboard
    • Enable the SmartSync Service
      • Smart Sync Service Service Tray
        • Set Service Logon Settings
        • Start
        • Stop
        • Restart
        • Restart with detailed logs
        • Show Log
        • Clear Log
        • Exit
    • Set Synchronization Direction
      • Backup Mode
      • Restore Mode
    • Architecture Selection
      • Single Site
      • Federated
      • Independent
    • Server Labeling
    • Mode Selection
    • Server Linking
    • Storage Linking
    • Licensing
    • Add Camera
    • First Synchronization Run
    • Replace Camera
    • Move Camera
    • Delete Camera
    • Device Selection
    • Synchronize Hardware
    • Synchronize Camera
    • Synchronize Microphone
    • Synchronize Speaker
    • Synchronize Device Input
    • Synchronize Device Output
    • Synchronize Metadata
    • Synchronize Groups
    • Synchronize Roles
    • Synchronize Views
    • Scheduling Runs
      • Enable the SmartSync Scheduling
      • Disable the SmartSync Scheduling
  • ▶️Run Dashboard
    • Accessing the Dashboard
    • Run/Process Dashboard Details
  • 📊Workflows Dashboard
    • Accessing the Dashboard
    • Replicate Devices
    • Find and Fix Inconsistencies
    • Stream Selection
    • Roles Synchronization
    • Camera Password Updater
    • Reaction Time
    • Failback
    • Priority
    • Overlay
    • Logging
    • Export Log
    • Web API
    • Tune Performance
  • 💻High Availablity in the Smart Client
    • Prerequisites
    • Creating a High Availability View
    • High Availability Live Views
    • High Availability Playback
    • High Availability Independent Playback
    • PTZ Preset Management
      • Add PTZ Preset
      • Update PTZ Preset
      • Delete PTZ Preset
    • Video Export
    • High Availablity Bookmarks
    • Unified Start/Stop Recording Control
    • Joystick Support
    • Snapshot
  • 🔗Rest API
  • 🧩Integrations
    • VMS
    • PSIM
  • 👷Migration In Progress
Powered by GitBook
LogoLogo

Library

  • Redundancy
  • XPort

Website

  • Home
  • Contact Us

Privacy Policy

  • Policy

© 2025 Vega Systems Inc. All rights reserved.

On this page
  • Prerequisite
  • Link the Servers
Export as PDF
  1. Configuration Dashboard

Server Linking

Link the Primary and Secondary recording servers.

PreviousMode SelectionNextStorage Linking

Last updated 6 days ago

The Server Linking process associates a Primary recording server with a Secondary recording server.

Prerequisite

Complete Server Labeling

Link the Servers

Perform the following steps to link the Primary and Secondary servers.

  1. Select Link Servers.

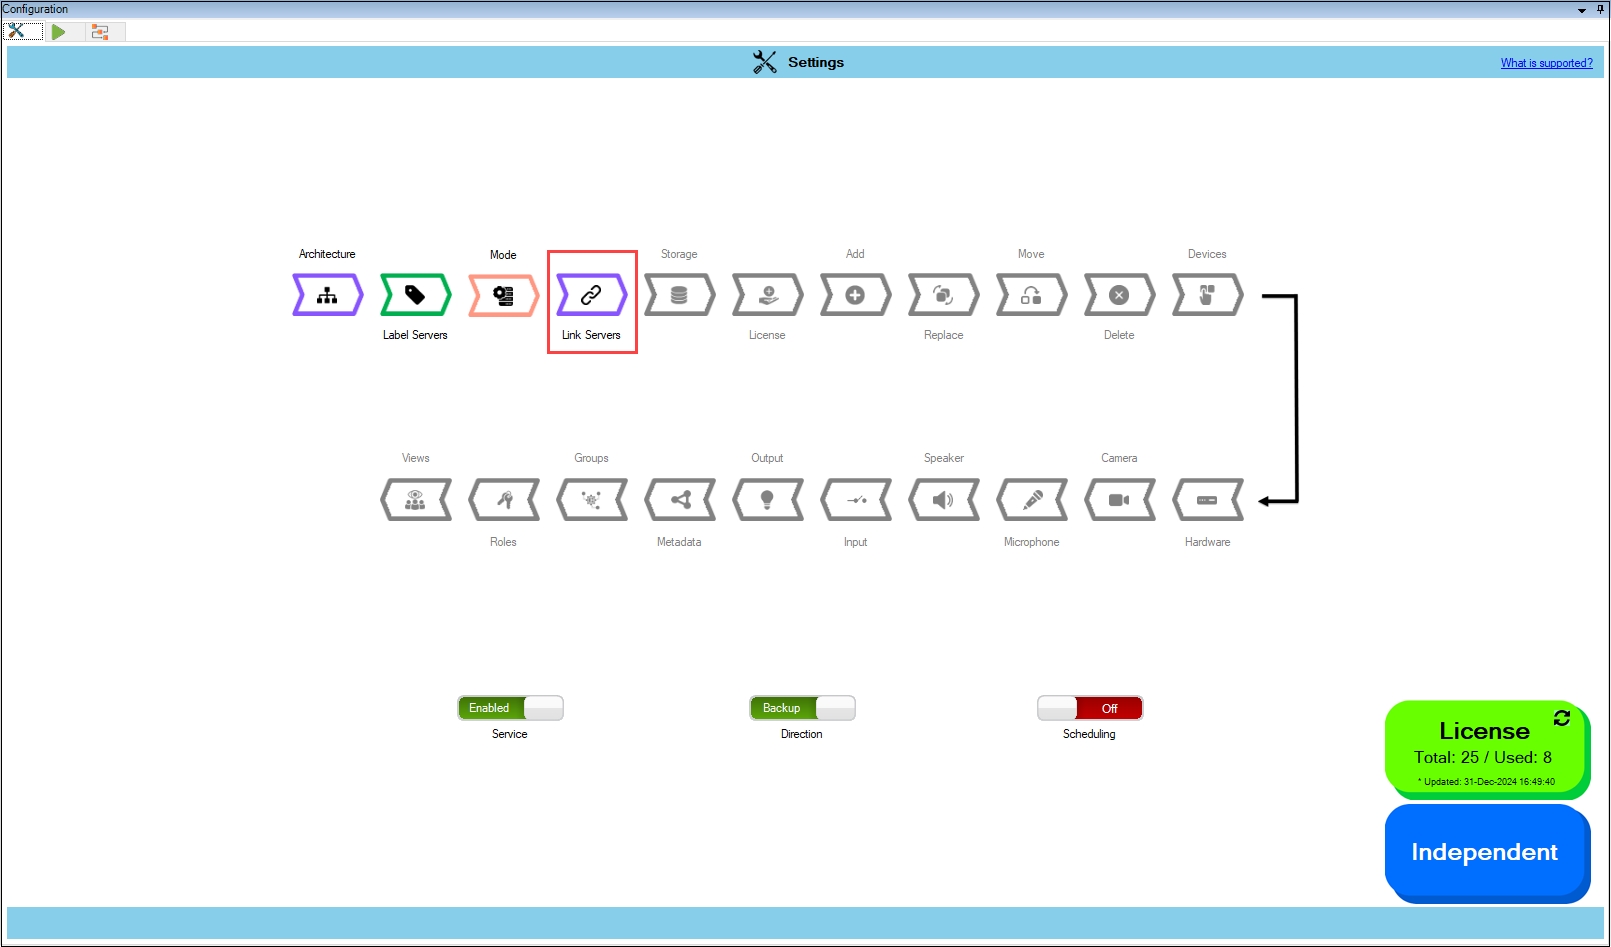
Step Result: The Data Refresh Tool Dialog box appears.

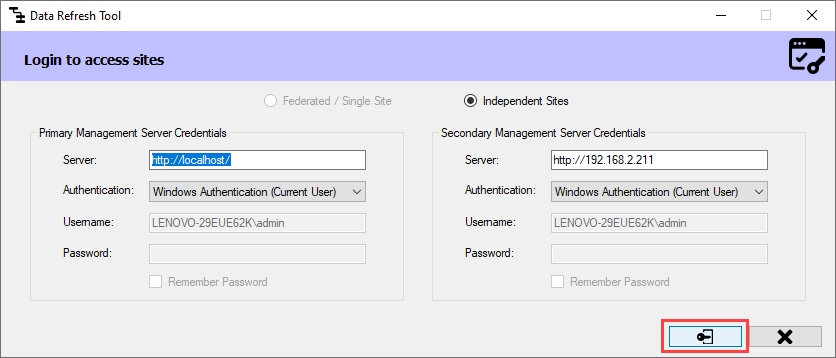
a. For an Independent architecture, the following screen appears:

Note: You must log in with administrator privileges.

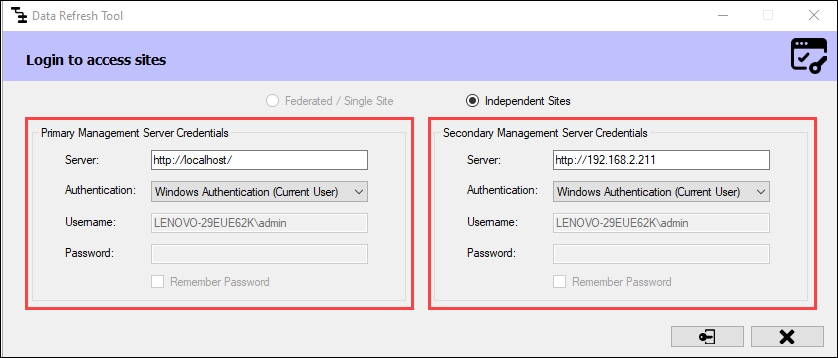
Click Connect at the bottom right corner of the screen to continue.

b. For Federated/Single Site, the following screen appears:

Note: If your XProtect architecture is Federated, log in to the Parent Management Server.

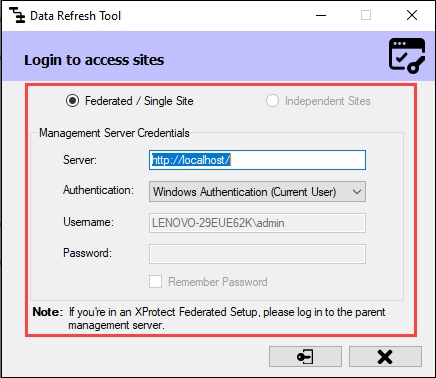
Click Connect at the bottom right of the screen to continue.

Step Result: The Link Servers screen appears.

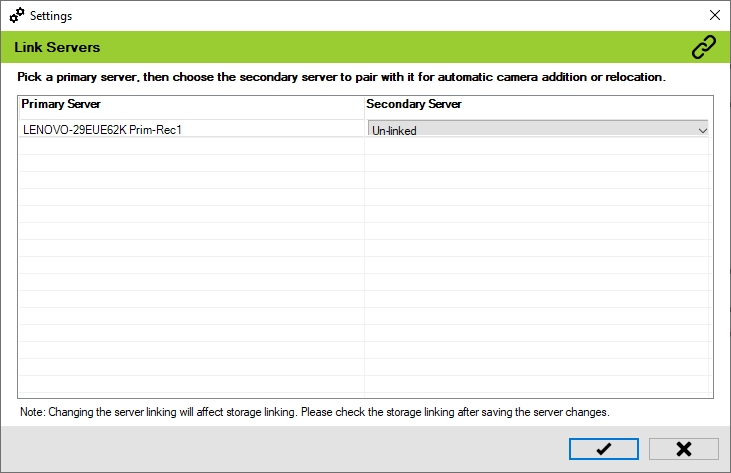
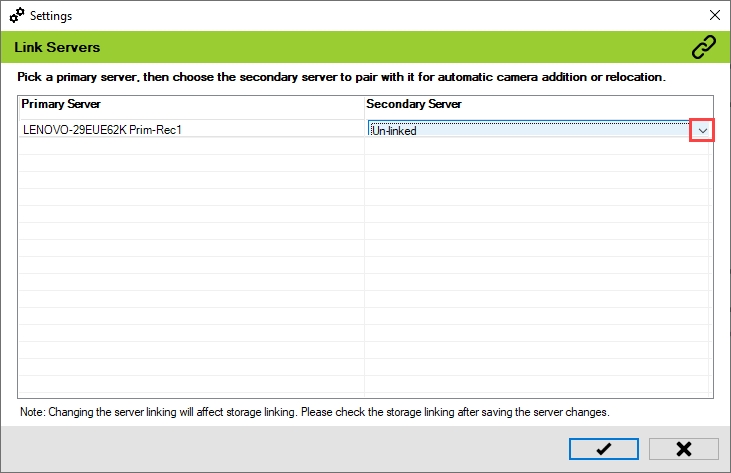
  1. Click the drop-down under the Secondary Server section to view the list of Secondary servers.

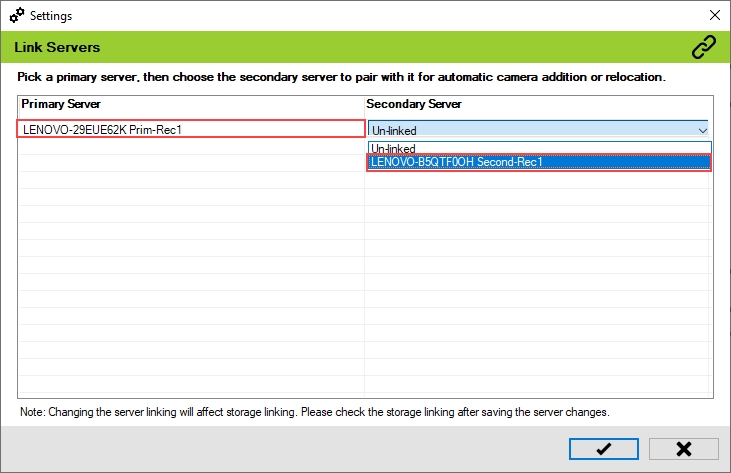
  1. Select the Secondary server to link to the relevant Primary server.

Note: Storage linking is impacted whenever the Server linking is updated. Verify the storage linking after saving the server changes.

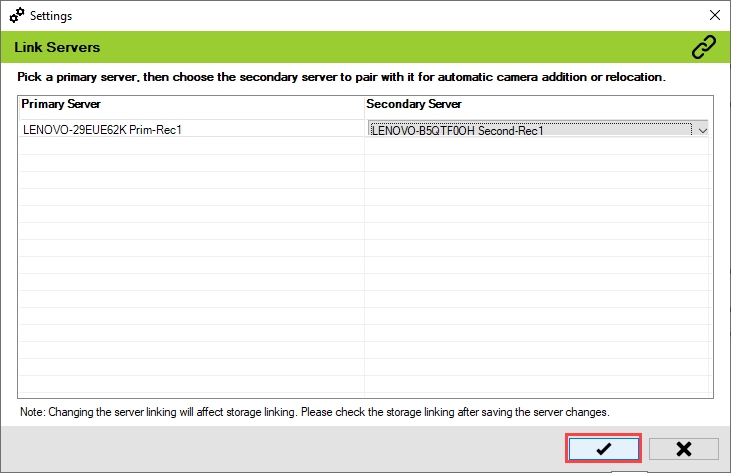
  1. Click the tick mark at the bottom of the screen to save the changes.

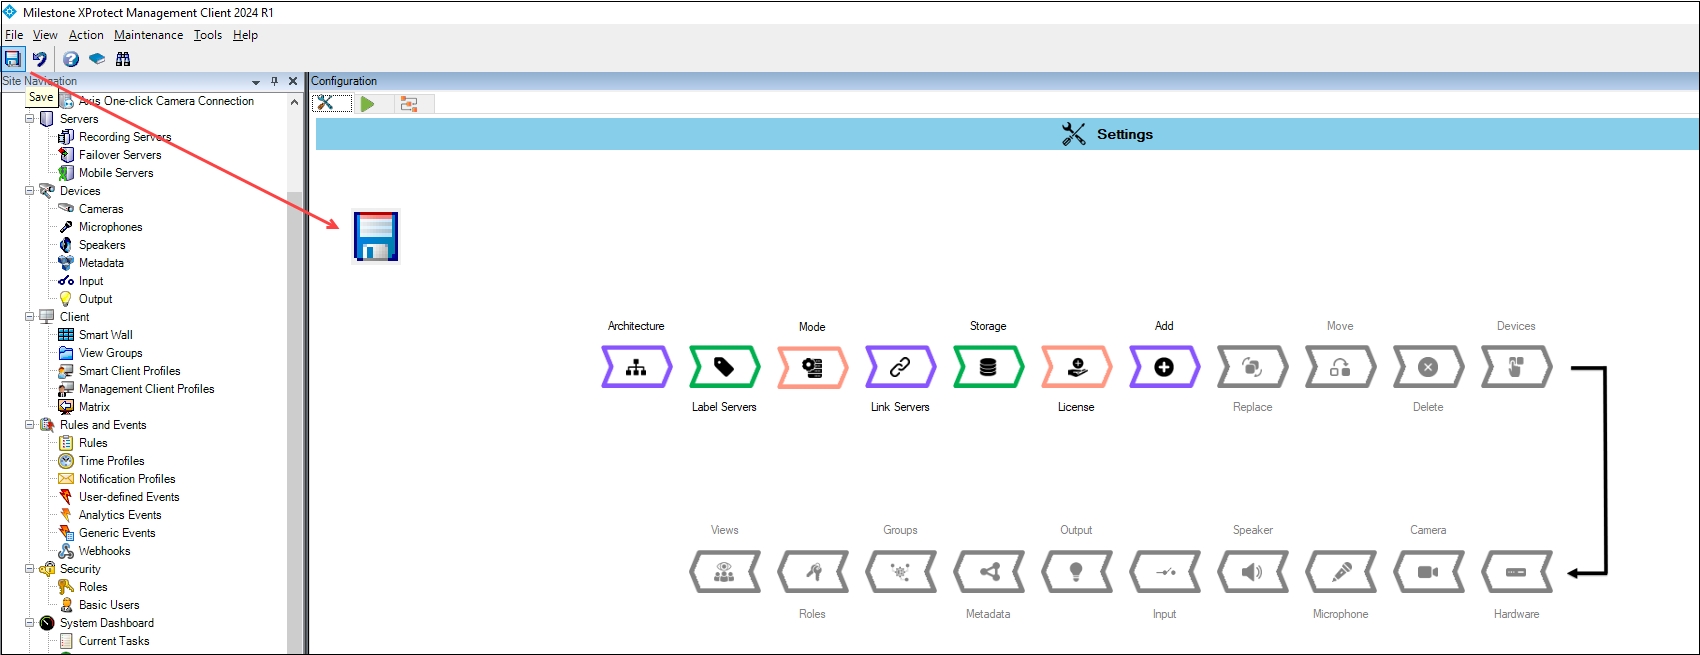
  1. Click Save in the Milestone toolbar to save the changes.

Note: RMF supports Asymmetric Server Linking, enabling multiple Primary recording servers to be associated with a single Secondary recording server. RMF automatically synchronizes and updates cameras between Primary servers and linked Secondary servers. See:

⚙️
https://youtu.be/jaGwtBUrb4E
Link Servers Option
Login Screen—Independent
Connect Option—Independent
Connect Option—Federated/Single Site
Link Servers Screen
Secondary Servers—Drop-down
Secondary Server Screen
Save Icon
Save Icon—Milestone Toolbar